Volume 7, No 3 - March, 2002
|
|
Volume 7, No 3 - March, 2002 |
|
|
|
|
|
|
President - |
Vice President - |
||
|
Treasurer - |
Secretary - |
Ed Gladkowski |
|
|
Webmaster - |
Editors - |
Membership Information
Membership is open to all those interested in machining metal and tinkering with machines. The purpose of the club is to provide a forum for the exchanging of ideas and information. This includes, to a large degree, education in the art of machine tools and practices. There is a severe shortage of written information that a beginning hobbyist can understand and use. This makes an organization such as this even more important.
Business Meeting
Minutes are sent via email or regular mail to club members.
Regular Meeting
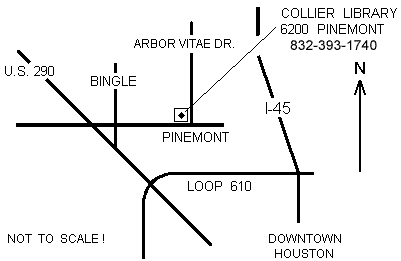
1:00 p.m., January 12, 2002 at Collier Library, 6200 Pinemont, Houston, Texas, President Dennis Cranston presiding. There were 45 + attendees plus visitor Jeff Michal.
President Cranston requests all borrowed club video tapes be returned to Dave Whittaker, Librarian, as soon as possible.
There will be an auction for HMSC members and invited guests. Details will be sent via email and US mail. Also, the club’s swap meet will be finalized at the March meeting.
Presentation
|
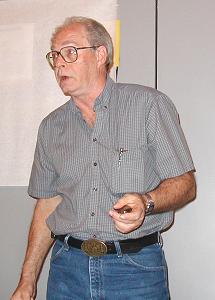
Cecil Demeritt gave a thought-provoking talk and slide show about vibration and balancing. He spoke on causes and damaging effects of vibration, and analyzing methods for tracking it down and correcting it. |
Show and Tell
|
|
|
|
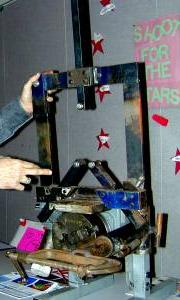
John Lilly showed a large-capacity steady rest he built as well as a welding positioner he is building out of an interesting mix of adapted parts. |
|
|
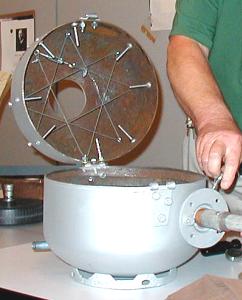
Art Volz, about to join the Band of Merry Metal Melters, showed his almost complete aluminum melting furnace. Built under a no-weld constraint, it has some very clever ideas and workmanship, and will use a homemade propane burner that Art showed us last December. The flying wires and bolts will support castable refractory. |
|
|
Joe Scott showed a flexible-shaft rig he is building to add a 3rd. axis capability to his lathe. |
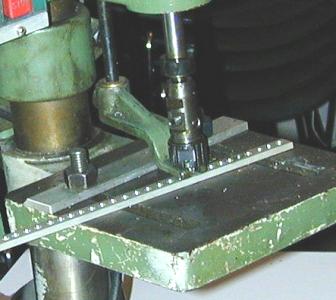
Jerry Farek showed a very neat chain-driven elevating router table insert that he built. |
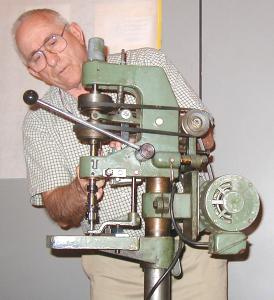
Doug Chartier showed a couple of old Wescott pattern drill chucks, made by Skinner, that he found.
Richard Pilcher showed another unidentifiable “What’s It?” that he obtained at a yard sale.
Featured Articles - Handling Lathe Chucks
Spindle Lock
for |
|
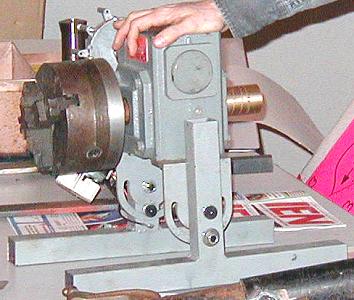
If you use the back gear alone as a lock, it is quite easy to break the teeth off the drive gears when you apply serious torque! My piece is used for a stuck chuck, not for normal spindle locking. The lock is a fair bit of trouble to put on, but it serves to remind you not to get stuck in the future.
|
Chuck Cradle |
|
Although
I never have dropped a chuck onto my lathe bed, I’ve come close to it
and that’s why I built some wooden chuck cradle blocks. My 11-in. Rockwell
lathe has a 1-1/2 x 8 threaded spindle nose. In order to align the thread on my chucks
and faceplates while I screw them on to the spindle, I made several wood
supports that cradle the chucks and maintain them coaxial to the spindle. I
just hold the chuck with one hand and turn the bull gear with the other to
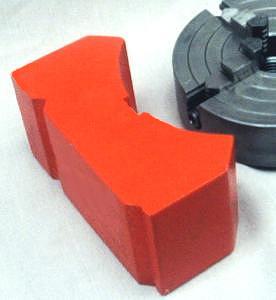
engage the mounting thread and snug it up. The blocks were band sawed from a
yellow pine 4x4 and painted bright red so I could see them up on the workshop shelves. A
V-groove was sawn into the block's bottom to ride on the lathe’s inverted V-way. Some of
the blocks have a relief notch cut in the center of the curved cradle to clear the protruding jaw
screws on my 4-jaw chucks. All of my chucks and face plates fit on just three
cradle blocks; 5, 6, and 8 in. diameter.
Chuck
Sky Hook |
|
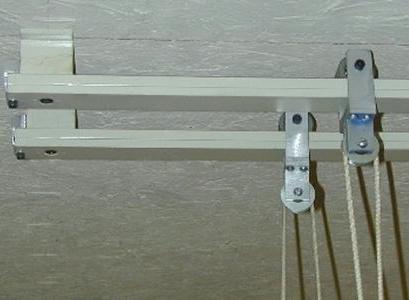
The ceiling rails are made of shallow 1 in. wide x 1/16 in. wall thickness aluminum channel. This rests on 1/4 x 1 in. CRS bar that is then screwed through spacers to the ceiling-joists. There is about 5/16 in. clearance along each side of the channel on which little ball-bearing wheels, made for sliding glass doors, roll. Similar wheels are available at most local hardware stores. The wheel brackets are made-up of scrap aluminum extrusions.
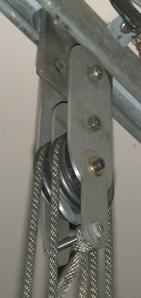
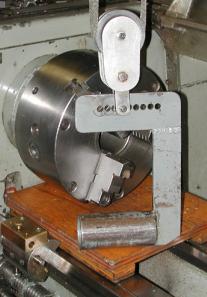
Chuck
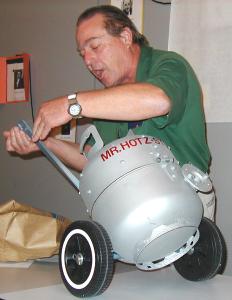
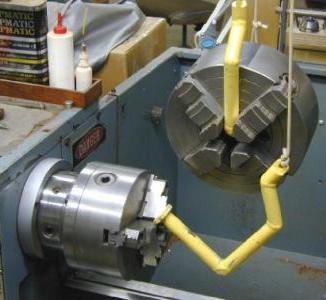
Carrier |
|
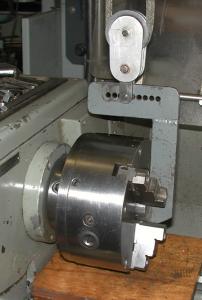
This fixture assists in changing chucks on my lathe. The unit has a center section of 1-1/4 inch pipe for the jaws to grip and the vertical frame is made of 5/16 inch steel plate and the top is of 1/4 inch flat bar drilled for attaching the pulley. The three parts are a weldment. The top section has several holes for the lower block connection and are to adjust the center of balance of the lift point. The blocks are made with 2-1/2 inch nylon aircraft style pulleys with needle bearings. The side plates are from 3/16 inch hard aluminum plate. The top pulley assembly is of similar construction and is connected to a (commercial roller bearing assembly that rides inside the top rail section of Unistrut material. The rail is attached to the ceiling joists with several No. 14 long sheet metal screws. The rope is commercial Nylon braided material and is of sufficient length for the chuck to be placed on the floor in a storage box. Normal use is to set the 8 inch three jaw chuck on the work bench near the lathe while collets are being used. The chuck jaws are clamped lightly on the fixture during handling and a section of plywood is set on the ways to prevent damage should the chuck be dropped. I have a large 70 lb. four jaw chuck that mandates the use of this lifting equipment as it is beyond my present physical strength. This unit is made for cam-lock mounting chucks but could be revised for threaded chucks by building the lower section with a rotating pipe.
Editors Note: When asking for some ideas on storing unused lathe chucks, we got the following responses from this month's authors:
Dick Kostelnicek: My small lathe chucks and face plates are manageable by hand. I nailed two 1/2 X 1/2 in. wood strips onto a wall mounted shelf. The chucks and faceplates stand on their sides (chuck axis parallel to the shelf) and are chocked between the strips. My shop is airconditioned, so I don't oil their surfaces less I drop them while manually transporting then to the lathe.
Jan Rowland: My 12 in. face-plate hangs on a 3/8 in. diameter spike driven into a wall stud. The 3- or 4-jaw chuck, when not in use, hangs from the sky hook used to remove it.
J. R.Williams: I keep my chucks in wood boxes with drop-in lids. That keeps them free of dust and in a uniform atmosphere. They are oiled before they go into their box. There never has been a rusting problem. I made a special handle to set my big 4 jaw chuck in it's box.
|
The next meeting will be held on Saturday March, 9 2002 at the Collier Library 6200 Pinemont, Houston, TX at 1:00 p.m. Bring along a work in progress to show. Visit Our Web Site |
 |