Volume 9, No 11 - November 2004
|
|
Volume 9, No 11 - November 2004 |
|
|
|
|
|
| President - |
Vice President - |
||
| Treasurer - |
Secretary - |
||
| Webmaster |
Editors - |
||
| Founder - |
SIG Coordinators - |
Statement of Purpose
Membership is open to all those interested in machining metal and tinkering with machines. The club provides a forum for the exchanging of ideas and information. This includes, to a large degree, education in the art of machine tools and practices. Our web site endeavors to bring into the public domain written information that the hobbyist can understand and use. This makes an organization such as this even more important.November Presentation
Jim Lemcke, owner of Texas Knife Maker's Supply, will present a program on custom knife making including machine work, finishing of knife kits, hardening and tempering steel and methods of manufacture. Methods will include normal metal removal as well as forging. He will present folding as well as fixed blade knives in various stages of completion.
Regular Meeting
Last Reminder: Dues are due for 2004-2005. $15 / year. Please make your check payable to John Hoff - Treasurer.
|
|
|
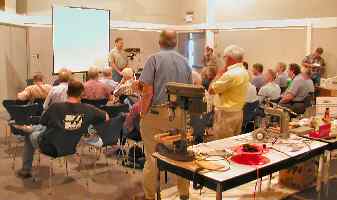
Collier Library, Houston Texas, October 9, 2004, 1:00 p.m., Chuck West - President, presiding. There were 33 members attending with one guest, Dean Patrick.
Joseph Scott mentioned the Houston Gun Collectors Assn. show on November, 13-14. Doug Chartier talked about the value of the club considering some sort of community service. Don Foster announced the availability of his steam engine display for viewing by qualified groups. Jan Rowland had some extra tickets for the Houston, TX AmCon trade show and a flash card reader that needed a good home. Chuck West presented Tom Moore with a plaque in appreciation for his two year presidential service to the club.
Business Meeting
Minutes are sent via email or regular mail to club members.
Presentation
|
|
|
Dennis Cranston gave a comprehensive presentation about home brew CNC (Computer Numerical Control,). He discussed and fielded questions concerning all aspects from the computer to the axis drive. He also demonstrated a CAD (Computer Aided Design) program used to layout parts and run CAM (Computer Aided Manufacturing) generated code.
Special Interest Groups Activity:
Novice Group
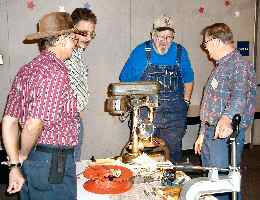
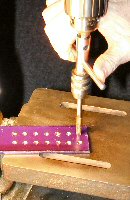 Tapping,
Threading, and Torquing: The novice group had hands-on training with
hand tapping, a manual drill press tap holder, a drill press center point
holder, and a manual tap machine under the guidance Tom Moore. The perpendicularity
of the tapped holes were then tested with a 12" threaded rod and a steel
square.
Tapping,
Threading, and Torquing: The novice group had hands-on training with
hand tapping, a manual drill press tap holder, a drill press center point
holder, and a manual tap machine under the guidance Tom Moore. The perpendicularity
of the tapped holes were then tested with a 12" threaded rod and a steel
square.
A rod was threaded by the novices using a die and manual die holder. A long drunken thread and a deep threaded hole were passed around to show the limitations of hand threading.
The tapped holes of various hole depths, and high and low strength bolts were torque tested to breaking/stripping. The high strength bolts broke/stripped at about twice the torque of the low strength bolts. Using a blank of half the bolt thickness resulted in stripping the blank thread or the bolt thread; when using a blank thickness equal the nominal bolt diameter, the bolt broke regardless of the bolt strength.
One machinist's notebook was handed out to a new novice. Next time we will lay out and drill a drill gauge.
Show and Tell
|
|
|
|
|
Featured Articles
Surface
Grinding (Part 2) - Choosing and
Preparing
the Wheel
by Sparky - HMSC
Member
Wheel selection starts at the machine's spindle mounting adapter, which determines the hole size and thickness of the wheel that can be accommodated. Spindle rpm, and the surrounding wheel guards, limit the maximum outside wheel diameter. Additional wheel specifications can be narrowed down by examining the type of material to be ground. I say narrowed, because various combinations of grit size, bond type, abrasive type, hardness and feed rate can lead either to a good grind or a great deal of frustration. Selection of wheel shape, however, is a much simpler problem. Peripheral wheels, those where grinding occurs along the wheel's outer diameter, are the most common type used. Cup shaped wheels, where a portion of the wheel's side is utilized, are employed in vertical face work. Wheel cost should be the least important of all factors. Pricey but well respected wheel manufactures, such as Norton, consistently provide well made abrasive wheels. Cheap domestic and many import wheels deliver variable and frequently poor performance. As always, you generally get what you pay for. A good wheel will surface an incredible amount of work before it is worn down and is too small in diameter to be useful. Money is best saved on tooling rather than on the wheel itself.
With size and shape chosen, abrasive type is the next thing to consider. Softer materials (as far as grindability is concerned) such as plastics through high speed steel, will be easily ground with aluminum oxide (AO). Harder materials, including carbide and scale from heat treatment, will require silicon carbide (SC). I also prefer silicon carbide for cast iron, indicating that there is no hard line between abrasive choices. If a job is turning out to be a real problem, try a different abrasive type. That's part of the learning curve! Within these two groups, AO and SC, there is a wide range of toughness of the individual grains. When you dress a wheel or when it self sharpens through wear, it's not just whole grains that are getting ripped out of the bond. Individual grains fracture to form new cutting edges, how well and how easily they do that is the most important characteristic of the wheel. Some would argue that bond type is more important, but I think it is the grain's friability. Other abrasive types, sometimes called exotics are diamond and cubic boron nitride (CBN). If you use them at all, the most important thing to remember is that diamonds can't handle heat very well. If they don't fracture from thermal shock they can revert to graphite, which is not a good cutting material. Also, diamond wheels should not be used on steel. CBN is nearly as hard as diamond and takes the heat better. It is also useful on steel.
 Bond type is the next thing to consider. Vitrified
bond is the most common and, just as it sounds, it is a glass-like glue that
cements the grains together. It makes the wheel rigid and at the same time creates
a very brittle but dimensionally stable wheel. This is why it is so important
to ring or check for cracks before a wheel is used. Ringing or tapping a vitrified
bond wheel is pretty straight forward. Where to tap it is important ( see left
photo ). On the
side of the wheel, imagine two lines crossing in the center, one vertical and
one horizontal. Let those lines define quadrants. The place to tap is about
in the middle of either top quadrant near the wheel's periphery. Support the
wheel on a pencil or dowel through the hub's hole and tap the wheel with a piece
of wood or plastic. A chip brush handle makes a good striker. Rotate the wheel
about 45 degrees and tap it again. If it rings well like a bell, it's OK. If
it sounds dead with a thud, send it back to its owner or throw it away. Buying
or picking up a cracked or broken wheel can happen to anyone. However, mounting
and getting hurt by one shouldn't be part of your day.
Bond type is the next thing to consider. Vitrified
bond is the most common and, just as it sounds, it is a glass-like glue that
cements the grains together. It makes the wheel rigid and at the same time creates
a very brittle but dimensionally stable wheel. This is why it is so important
to ring or check for cracks before a wheel is used. Ringing or tapping a vitrified
bond wheel is pretty straight forward. Where to tap it is important ( see left
photo ). On the
side of the wheel, imagine two lines crossing in the center, one vertical and
one horizontal. Let those lines define quadrants. The place to tap is about
in the middle of either top quadrant near the wheel's periphery. Support the
wheel on a pencil or dowel through the hub's hole and tap the wheel with a piece
of wood or plastic. A chip brush handle makes a good striker. Rotate the wheel
about 45 degrees and tap it again. If it rings well like a bell, it's OK. If
it sounds dead with a thud, send it back to its owner or throw it away. Buying
or picking up a cracked or broken wheel can happen to anyone. However, mounting
and getting hurt by one shouldn't be part of your day.
Organic bonded wheels, ranging from phenolic to rubber, are next in importance. As would be expected, organic is not as rigid or as strong as a vitrified bond. A dull or poorly cutting grain won't stay on an organic bonded wheel very long, so they wear more rapidly but grind cool. Structure, or the openness between grains, is not completely determined by grit size. The amount of bond material between the grains and the openness or distance between grains has a lot to do with it. This open space is where the cuttings from the work are caught and carried away. The openness of a wheel's structure seems to mean something different to each manufacturer, but I think it is probably the biggest reason cheap wheels perform poorly. Remember a grinding wheel is a cutting tool, and therefore, the cutting edges need relief.
Grain size is an easy choice. Coarser grits are for heavier stock removal and produce poor surface finish. Fine grits and light cuts can produce some pretty impressive finishes. For average work, a 36 or 46 grit will remove stock at a decent rate and still leave a good looking finish. Grade or hardness is as also important. Grades vary from A, the softest, to Z, the hardest. Increasing hardness generally means that it takes longer for the grains and the bond to break down. This is also where the wet or dry grinding issue comes into play. In a soft wheel, the grains either break down or break out before they get completely dull as compared to a hard wheel. Therefore, the wheel cuts cooler since it is sharper and generates less frictional heat. The consequence is that you'll have to dress a soft wheel more often. If that becomes a problem, consider using a harder wheel along with mist or flood coolant. From my experience, I prefer dry grinding with soft wheels. In any case, I error on the side of soft wheels.
Another type is the cut-off wheel. They�re convenient to have around, but can be quite dangerous! They are easily mis-mounted and consequently can become broken during use. The bigger pieces often have some nasty aerodynamic properties. They are good for making undercuts in corners of a solid workpiece. The biggest mistake made with cut-off wheels is not feeding them hard and fast enough, hence, overheating. In getting the best use out of a cut-off wheel, you will encounter some larger cutting forces. Hold the work securely and place it so that the wheel can't bind or hog-in.
Here are some rules of thumb: Rapid glazing or dulling will tell you that the wheel is too hard and / or is of the wrong abrasive type. If it's loading up, it's not open enough. If it's wearing too rapidly, it's probably too soft. As the diameter decreases, at a fixed rpm, the surface feet-per-minute decreases, thereby causing the apparent hardness to diminish. The catalogues from the more prominent tool supply houses are a good source of information on grinding wheels. Manufacturers' recommendations on specific abrasives, grades, and structures are very useful. Technology changes often, so read what they have to say, try their suggestions and then make up your own mind.
 Preparing
the wheel consists of dressing and truing. These are Siamese twins and often happen at the same time and
with the same tool. The distinction between them is clearly a gray area. Dressing is
for the restoration of the cutting action of the wheel. Truing or better, "bringing
the wheel to truth", is a shaping operation and can be as simple as providing
a straight
surface on the wheel's face to a complex
"form" to be mirrored on the part. As you can see, with most wheels
it would be pretty hard to do one without the other going along for the ride.
Preparing
the wheel consists of dressing and truing. These are Siamese twins and often happen at the same time and
with the same tool. The distinction between them is clearly a gray area. Dressing is
for the restoration of the cutting action of the wheel. Truing or better, "bringing
the wheel to truth", is a shaping operation and can be as simple as providing
a straight
surface on the wheel's face to a complex
"form" to be mirrored on the part. As you can see, with most wheels
it would be pretty hard to do one without the other going along for the ride.
With a freshly mounted wheel the first thing to do is "true" the wheel. That can best be accomplished with a diamond set aside just for that task. An "old" or worn diamond, whose "dressing" days are over, can be used much more roughly without worry. You can take much heavier cuts on the wheel to get it roughed in to concentricity and shape, 0.005 inches or more if you dare. Just watch out for the impact zone or where you are throwing the "rocks". They will sand blast most anything in their path. Place the diamond at the far or "downwind" end of the chuck and magnetize the chuck. Raise the wheel and move the table to position the diamond just aft (rotationally) of the bottom middle of the wheel ( see the drawing at the right ). Feed the wheel down slowly and carefully until you make contact. Then, cross feed the table (diamond ) back and forth across the wheel face. Feed the wheel down about 0.005 inches and take another pass on the wheel, continue until you're sure you've cleaned up the wheel all the way around and removed the wheel edge rounding to suit your needs. With that accomplished, change to your "good and sharp" diamond and repeat the process, but don't take more than 0.001 inches off the wheel per pass. For average work this should do well, for finer work use smaller depth increments and finish with a couple of "free, no down feed " passes. Feeding across the wheel can be relatively fast for truing and slow for really fine dressing work. Just don't go so slow as to "glaze" the wheel. Don't let your diamond get too hot, If you've got coolant, use it, if you don't mind the mess. Lastly, rotate your diamond(s) in their holders often so that they wear evenly.
When to re-dress is a judgment call with no hard and fast rules apply. For plain surface grinding, watching the wheel face as you're grinding to see where it's doing the cutting, will tell you how much "true" face you have left. If it will get you to a good stopping point to re-dress then you are OK, and this pretty much confirms your wheel choice. For form grinding, you'll need to look at part accuracy and finish, how hot and how fast the part is getting and the "feel" of the cut.
Shop Tip for the Wedded Machinist.
By
Vance Burns - HMSC Member
 I've
purchase a new pair of work boots, and find they are capable, in fact prone
to accumulate incredible amounts of swarf, chips, and sawdust. While this is
of small consequence in most areas of the shop, this liberal attitude does not
extend beyond the perimeter of the garage. This reporter found himself with
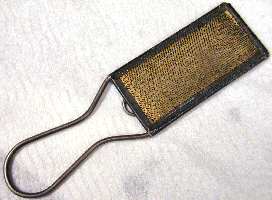
congested footwear, and a file card in hand. Scourging, an established deterrent,
helped me remember to clean my shoes before entering the living quarters. To
my delight, I found the file card cleaned my boots far better than anything
tried previous. Functional equilibrium required.
I've
purchase a new pair of work boots, and find they are capable, in fact prone
to accumulate incredible amounts of swarf, chips, and sawdust. While this is
of small consequence in most areas of the shop, this liberal attitude does not
extend beyond the perimeter of the garage. This reporter found himself with
congested footwear, and a file card in hand. Scourging, an established deterrent,
helped me remember to clean my shoes before entering the living quarters. To
my delight, I found the file card cleaned my boots far better than anything
tried previous. Functional equilibrium required.
Adjustable Wrench
Modifications
J. R. Williams - HMSC MEMBER
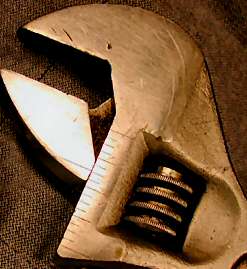
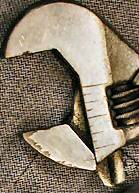 The photos
show examples from my collection of adjustable wrenches with their modifications.
I engraved a scale on the flat area at the junction of the jaw and frame
with markings in inches. This provides a simple measuring device. It
is handy when you don't know the size of a nut, and can use the wrench as an
adjustable caliper. The second modification, at the right, was to file
down the moveable jaw to provide a larger wrench opening. It seems you
always need a slightly larger wrench. The opening size of the wrench in the
right photo was modified around fifty years ago.
The photos
show examples from my collection of adjustable wrenches with their modifications.
I engraved a scale on the flat area at the junction of the jaw and frame
with markings in inches. This provides a simple measuring device. It
is handy when you don't know the size of a nut, and can use the wrench as an
adjustable caliper. The second modification, at the right, was to file
down the moveable jaw to provide a larger wrench opening. It seems you
always need a slightly larger wrench. The opening size of the wrench in the
right photo was modified around fifty years ago.
Demise
of the Local Parts House
by Dick Kostelnicek - HMSC Member
I used to enjoy trips to my local auto parts store. You didn't have to change clothes, the dirtier you were, the better you blended in. You could belly up to the counter, ask for advice, and get darn near any part for your tired old car. It might take at most a day to get it delivered from the warehouse, but there was always an eager soul in the store to make sure that you got just what you needed. Well folks, those days are gone.
Recently, an old friend of a tree fell over in my yard, taken out by a strong gust of wind and a diseased trunk. Well, I got down my 35 year old Craftsman chain saw from storage, did all the things that the well illustrated manual said to prepare it for service, and pulled the starter cord. Not a wimpier from the all aluminum ( pre-ABS / PVC ) bodied saw. After some diagnosis I found the spark plug wire was hardened and cracked from age. Obviously, it was suffering from 35 years of ozone pollution ( pre-silicone rubber ). So, off to the auto parts house for about a foot of plug wire and to treat myself to a new spark plug. "No, we don't have a roll of spark plug wire" was the answer to my query. "We only have custom plug wire sets. Do you have the make and model year of the vehicle?" Now in the past they would bring out several rolls of plug wire and you would make your selection based on diameter, insulation type, color, etc. After checking with the four other parts houses within driving distance, not a scrap of loose plug wire was to be found. One counter clerk even said, "Can't you use hook-up wire? We have small rolls of that over here!" So much for that old sage parts house advice.
Well, as my father taught me, consolidate your tasks into one trip. I didn't come just for plug wire. I also brought along my used motor oil to dispose of properly. I still change my own oil. It gives me a chance to wiggle under the car to determine just how much weight I've gained and how far my arthritis has progressed. My local parts house has been collecting used oil ever since the EPA shamed us into not using it to kill the grass along the fence line. So, I carried in four one-gallon containers of oil and was told to go into the back room and dump it into the reclaim barrel. Now, I've been in that back room many times over the past 35 years and always enjoyed my visit even though the place has changed hands 6 or 7 times during that period. I have fond memories of borrowing pullers and getting advice from the folks in the back room to remove a pulley or two from a generator ( alternator of late ) that I wanted to replace. They also had a fair machine shop back there for turning brake drums and disks. Well, that's all gone. Just an empty work bench and the barrel of reclaimed oil remains.
As I left the store, I looked around to see what they currently offer for sale. Nearly all the stuff on the self-service shelves was motor oil, wax, cleaners, and make you car smell good perfumes. Oh, there was a 4x4 foot display of old car parts on bubble wrapped cards, things like an distributor rotor from a Chevy that I never owned, a generic choke cable, and a few other antique odds and ends. Behind the counter there were no gray haired sayers of sage wisdom, no dirty finger nail punk kids who knew how to fix-up anything so that it became louder and went faster, just a couple of clean shaven clerks in their company furnished uniforms who had passed their training course in swiping a credit card through a scanner and operating the bar code reader.
So, please pause for a minute to say a few words over the demise of the local parts house, a place where men went to be with men, talk a bit dirty, and get the where-with-all to prove that they could fix things, save a bit of money, and exercise control over their lives.
Epilogue: I'm ashamed, but I must admit defeat. I just bought a new gas ABS encased chain saw with anti-vibration suspension, anti-kick-back control, and a 3-year parts and service warranty at my local home improvement store. The operators' manual at first glance looks big, but that's because it is in three languages. It has no blow-up assembly drawings, no parts list, but does have 7 out of the 10 pages of lawyer inspired warnings of the dangers of using a chain saw. It's a famous brand ( starts with a "P" and ends with a "N", now a division of the Swedish conglomerate El.....ux Corp.). I finally found the paragraph on carburetor adjustments, thinking that I might need to do that some time down the road. It tells in precise detail how to turn the idle speed control screw, but leaves the fast and slow speed carb adjustments to a factory authorized dealer. Now. I've always sharpened my chain with a round file attached to a depth guide after each use. I've operated probably 10 different chain saws in my time and the filing angle and file diameter were always available in the written documentation. Thanks to the lawyers, that section in the operator's manual has become the following: "Chain sharpening is a complicated task that requires special tools. We recommend you refer chain sharpening to a professional chain sharpener."
So much for the do-it-yourselfer! I recommend "Chain
Sharpening" as a career choice for young individuals. I'll need your
services in the near future.
Mental-urgy (Part - 1) Practical Metallurgy for the Home Machinist
By Vance Burns - HMSC Member
Heat treating air hardening steels like A1 - get it really hot and let it cool. It's almost that easy to heat treat air-hardening tool steels. There are other considerations, please read on.
Steels, of a given recipe, harden predictably within a given set of recipe-specific rules. Obviously, all metals experience a dramatic physical change when reaching the melting point, but many subtle changes occur just before, and these changes can be manipulated to your advantage.
The scientific community doesn't exactly understand what happens, but they have theorems that seem to fit almost all scenarios. Rather than breath such heady Olympian air, lets speak to the Home Shop Machinist community. If you want more depth, we can address in later columns.
When cold-working tool steel, the metal is in a stable state, but it is just one of the many possible. Somewhere between room temperature and liquid, there is a transition point where the material is or begins to be, in a matter of speaking, reprogrammable. Metal can readily be reshaped in this state, and at least two physical characteristics can be decidedly influenced, hardness and toughness.
Heat is the tool of choice, and the goal is to reach a thermal point where the material gives up practical characteristics related to the afore mentioned hardness & toughness, and becomes a semisolid chemical / elemental soup. This is the point where most metals will stop attracting a magnet. This is hard on the magnet - so don't use the one in your pacemaker. Note: Very expensive materials tend to be characteristically nonmagnetic and yet still attract your wallet.
If allowed to cool slowly, most metals will follow a settling path to a soft, tough material, characteristic of the class. If cooled quickly (quenched) hardenable materials will generally have a dramatic decrease in their toughness and increase in their hardness.
There is a window of opportunity to harden the material, and some types have small windows (simple carbon 1095 is sub second) while others have windows so wide (air hardening ~60 minutes) air can act as a sufficient quenchant. As shown, steel type influences the window, with mass always remaining a factor - forget hardening your 14 inch chuck in the rain barrel.
If you've hardened 1095, you've probably seen acceptable results, and don't recall moving that fast. The published windows define lab perfection, and your results may be acceptable, without extracting the full potential of the material.
Simple carbon steels (ASM 10xx) have narrow windows, and complete hardening is difficult in the garage. Acceptable results are possible, thus the popularity of these inexpensive steels. Quenchant media is everything in these steels, and hardening of steels, previously believed unhardenable, show the story isn't over. The metallurgical elite are still scratching their heads over Robb Gunter's "Super Quench".
Required rapid cooling, the bane of the 10xx steels, can cause warping and stress failures. Industry has answers, but they don't readily transfer to the hobby shop. Air-hardening steels have tremendously wide windows, and it is possible to successfully harden alloys of this class. One side benefit is distortion; you just don't see the same problems experienced by oil or water quenched steels. Another is stress relief; materials cooling over longer periods tend to see fewer stress cracks.
http://lamar.colostate.edu/~doggett/iron.htm is a nice website which gives a good overview of metals science as pertains to this article.
Next month - I'll focus on A2 steel.
|
Visit Our Home Page at |
 |
Right click below then select [Save
Target As...]
From Netscape select [Save Link As..]
Microsoft
Word version of this newsletter 264 KB