
Volume 10, No 1 - January 2005
|
|
Volume 10, No 1 - January 2005 |
|
|
|
|
|
| President - |
Vice President - |
||
| Treasurer - |
Secretary - |
||
| Webmaster |
Editors - |
||
| Founder - |
SIG Coordinators - |
Statement of Purpose
Membership is open to all those interested in machining metal and tinkering with machines. The club provides a forum for the exchanging of ideas and information. This includes, to a large degree, education in the art of machine tools and practices. Our web site endeavors to bring into the public domain written information that the hobbyist can understand and use. This makes an organization such as this even more important.December Regular Meeting
Collier Library, Houston Texas, December 11, 2004, 1:00 p.m., Chuck West - President, presiding. There were 30 members attending with four guests: Dan Harper, Jim Clark, Tim Bailey, Rob Lucas-Dean.
Business Meeting
Minutes are sent via email or regular mail to club members.
Presentation
Joe Scott showed and discussed some videos. The first video dealt with forging of the M1 machine gun receiver. The second covered various aspects of manufacturing the Johnson Rifle.
Special Interest Groups Activity:
Novice Sig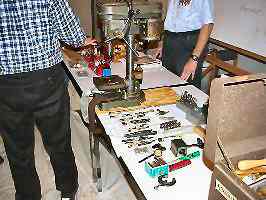
 The novice group discussed types
of drills bits and hole
drilling. They aligned (trammed) the drill press using a dial indicator in
order to determine
the perpendicularity of the table to the spindle's axis. Then they checked the runout of the
chuck. Examples of excessive speed (RPM ) were shown along with correct
speed vs. drill diameter vs. metal type were demonstrated. The need for center punching
and use of pilot
holes was explained. Various drill fixtures and jigs were shown. The group had hands-on
practice feeding drills for optimum drill life using a Teflon block and
measured the drill chip thickness with a micrometer.
The novice group discussed types
of drills bits and hole
drilling. They aligned (trammed) the drill press using a dial indicator in
order to determine
the perpendicularity of the table to the spindle's axis. Then they checked the runout of the
chuck. Examples of excessive speed (RPM ) were shown along with correct
speed vs. drill diameter vs. metal type were demonstrated. The need for center punching
and use of pilot
holes was explained. Various drill fixtures and jigs were shown. The group had hands-on
practice feeding drills for optimum drill life using a Teflon block and
measured the drill chip thickness with a micrometer.
Machinist's notebooks were distributed to the two new novices.
The January meeting will be about sharpening shop tools. Please bring a tool (knife, chisel, screw driver, high speed. lathe tool bit, etc.) that needs sharpening. We will also try to demonstrate a layout procedure using the 6-in. dial caliper with the aid of a video camera and the large TV screen.
CNC Sig
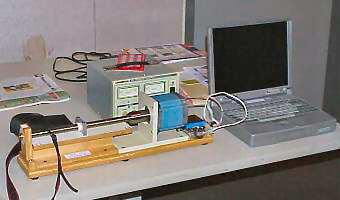 Jan Rowland brought in a show-and-tell setup of a
lead-screw turned by a stepper-motor driven by a famous Gecko drive
directly connected to the printer port of a laptop. With that, it could be
demonstrated how programmed moves could be easily made with home-brew hardware.
Jan Rowland brought in a show-and-tell setup of a
lead-screw turned by a stepper-motor driven by a famous Gecko drive
directly connected to the printer port of a laptop. With that, it could be
demonstrated how programmed moves could be easily made with home-brew hardware.
Show and Tell
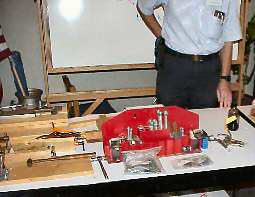
Doug Chartier showed a very nice tapping head for his machining center.
Joe Scott showed a tail stock turret and some tap and die holders for it.
Tim Bailey showed a rather impressive hand forged curtain rod end.
Rich Pilcher showed a shop built tail stock live chuck and list of operations for making the adapter and a micrometer stop chamfer tool.
Jan Rowland discussed a density calculation to try to determine the makeup of an unknown material. He also showed a photo of last months knife display.
Joe Scott talked about die drills and tapping a case hardened rifle
receiver.
 |
 |
 |
 |
Joe Williams passed around his C-clamp that
was pictured and discussed
in last months news letter. He also showed an old toolbox and its
contents that he recently acquired. |
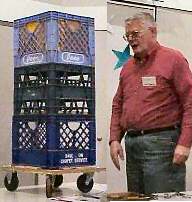
Tom Moore showed his milk crate dolly he uses for storage. |
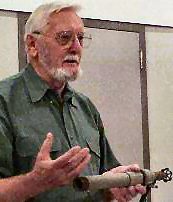
Rob Lucas-Dean showed his shop made Propane Burner and asked about
furnace building. |
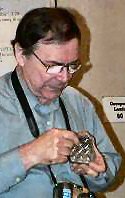
Dick Kostelnicek showed a commercial shim punch. |
Featured Articles
Measuring Density on the
Cheap
by Dick Kostelnicek and Jan Rowland - HMSC Members
 If you have a piece of material, it could be a metal
or wood bar, and you want to determine its specific density, that is the density
relative to water, in order to identify its composition, then read on..
Now, normally you would first have to determine the volume of the bar.
However, measuring volume is often a messy job since you need to submerge the piece under
water and note the amount of water displaced. This can be done with a
graduated cylinder or an overflow tank.
If you have a piece of material, it could be a metal
or wood bar, and you want to determine its specific density, that is the density
relative to water, in order to identify its composition, then read on..
Now, normally you would first have to determine the volume of the bar.
However, measuring volume is often a messy job since you need to submerge the piece under
water and note the amount of water displaced. This can be done with a
graduated cylinder or an overflow tank.
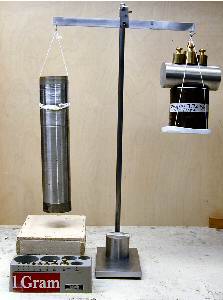
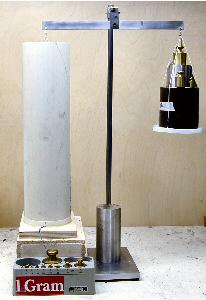
Well, you can get the specific density directly with just a bucket of water, a length of string, and a fish weighing scale. Now, the water in the bucket should be deep enough so that the unknown bar of material will be completely submerged without touching the bottom of the container. It is OK if the bar wants to float so long as the bucket is big enough that the bar can be submerged completely under water with the help of an addition sinker weight.
Method for density greater than 1.0: ( This is where the bar sinks on its own )
Weigh the bar hanging from a string in air ( see upper left
photo ). Call this amount Wa.
Weigh
the bar hanging from the string and completely submerged under water but
not touching the bucket's bottom (see upper right photo ). Call this amount Wb.
Then, the specific density D is given by the formula: D = Wa / (Wa - Wb).
Method for density less than 1.0: ( This is where the bar wants to float )
Get a sinker weight that is just heavy enough to submerge both the unknown bar and the sinker when both are lashed together.
Weigh
the bar alone in air. Call this amount Wa.
Determine the weight of the sinker by
itself under water. Call this amount
Ws.
Finally, lash
the bar and the sinker together and weigh them with both completely
submerged. Call that amount Wt.
Then, the specific density D of the unknown bar is given by the formula: D = Wa / (Wa + Ws - Wt)
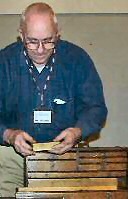
Jan Rowland - HMSC Member supplied the photos and constructed
a beam balance using an ultra low friction precision ball bearing for his density
measurements .
Manual Lever
Feed for a Mill-Drill
by Joseph Scott - HMSC Member
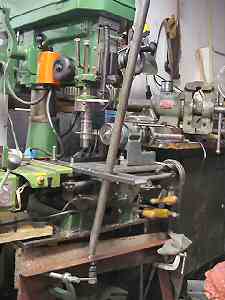
 I
needed to slot about 100 small fillister head screws on my mill-drill. Cranking
the Y-axis got old and was hurting my wrist, so I made a modification to mill.
Basically, I removed the Y-axis feed screw and installed a wobble stick hand-lever
to move the table for the slotting operation. Later, I took out the X-axis screw so
that the single lever would move the table in any horizontal path like
a joy stick. I will use it in the future to trace 2-D patterns
form original gun parts.
I
needed to slot about 100 small fillister head screws on my mill-drill. Cranking
the Y-axis got old and was hurting my wrist, so I made a modification to mill.
Basically, I removed the Y-axis feed screw and installed a wobble stick hand-lever
to move the table for the slotting operation. Later, I took out the X-axis screw so
that the single lever would move the table in any horizontal path like
a joy stick. I will use it in the future to trace 2-D patterns
form original gun parts.
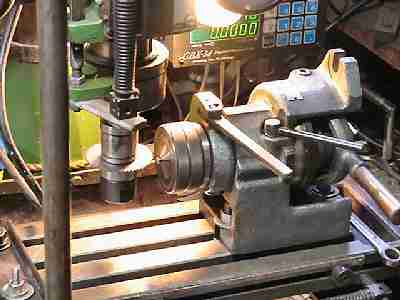
I did it this way: Drilled 2x1/2-in. channel to clamp on table with an additional hole for a 3/4-in. pipe lever. Clamped a 2x2-in. angle onto the mill's support legs and put a 1/2-in. bolt sticking up to form a pivot point. Removed the Y-axis screw and loosen its gib. Cleaned and oiled slide. Positioned table for depth of screw slot and locked the X-axis slide.
The screw slotting operation is as follows: Lever the table outwards. Install a new screw in the collet. Lever the table backwards for the cut. Reverse the lever. Repeat the operation.
Long ago I think these lever operated machines were called profilers.
More on Shop Air
Shut Off
by George Carlson - Former HMSC Member
I saw your article on using a photocell
to control the compressed air in your shop. I have my compressor mounted
outside in a little lean-to. It's nice, because it doesn't take
up space in the shop, and the insulation in the lean-to cuts the noise
to a whisper. Once, the compressor threw a belt, and the motor ran for
two days. So I had to come up with a fix. I wired a contactor (electrical
relay) in series with the 240VAC to the compressor. The primary or control side
of the contactor is connected to the shop's 110VAC lighting
circuit. So, now the compressor can only run when the shop lights are
on.. a very simple fix that works
quite well.
|
Visit Our Home Page at |
 |
Right
click below then select [Save Target As..]
From Netscape select [Save Link As..]
Microsoft
Word version of this newsletter 172 KB
